

Designing your own color badge stock for an event can be intimidating. Don’t know where to start? We’ve got you covered. Discover how Results at Hand can help you create professional, high-quality color badge stock for your events!
Below is a quick step-by-step tutorial you can follow.
Why Your Badge Stock Matters!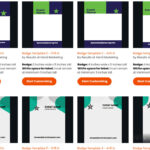
Badge stock is the pre-printed heavy cardstock paper/label format that already contains your event branding (logos, colors, sponsors, design elements, etc.) while leaving a dedicated blank area for the attendee label to print onsite. Your badge stock is the first impression of your event! You want to make sure it’s a good one.
Results at Hand’s templates are built specifically around that concept, including minimum required blank space for the printed label so you don’t have to guess.
Step 1: Pick the Right Badge Size for Your Event
Start by deciding what size badge you’re using (based on lanyards and how much info you plan to print). The templates set on the R@H page includes common sizes like 3×4, 3×5, 4×5, and 4×6 inches.
Important: Each size includes a minimum “white space for label” requirement (this is the area reserved for onsite badge printing). For example:![]()
- 3×4 in. badge stock: label space must remain at least 2.4 inches tall
- 4×5 and 4×6 in. badge stock: label space must remain at least 3 inches tall
Step 2: Pick Your Template in Canva
Choose from many of our pre-made templates, then:
- Click Start Customizing
- In Canva, select View Template, then Open in Editor
Step 3: Customize the Badge to Match Your Branding and/or Event Theme
Make the template your own! Remember when designing: the R@H templates are completely customizable and should be used as more of a starting point for your designs. Feel free to change colors, add or remove elements within the template, etc.
Update the design with unique elements, like:
- Event name
- Logos
- Sponsor Logos
- Brand colors
- Event theme
- Schedules
- Wi-Fi or hotel information
- Event dates/times
Did you know: you can print information on both sides of the badge cardstock? If you have a lot of information or would like to include event schedules, you can add that, too!
Step 4: Do not move guides or safe zones
If the template includes locked guides (borders, safe areas, label zones), keep them intact. The page specifically warns not to adjust/remove locked guides and to stay within the directed spaces.
This is what prevents a “beautiful design” from turning into “why is the logo under the name sticker” onsite.
Step 5: Export a print-ready PDF from Canva
When you’re finished designing:
- Click Share (top right)
- Click Download
- Set File Type to PDF Print
- If you have Canva Premium, set color profile to CMYK (best for professional printing). If not, export in RGB.
- Name the file clearly using event name + date + badge size (example format shown on the page).
Tip: For those who aren’t familiar with Canva or just need some extra help getting started, you can watch our tutorial here to learn more about how to design your color badge cardstock with Canva.
Step 6: Send it for approval & printing
Results at Hand request that you send the PDF and event details to their team for approval, after which they’ll follow up with next steps.
Quick final checklist
- Badge size confirmed (matches holders)
- Label area is clean and meets minimum space
- Guides/safe zones untouched
- Exported as PDF Print
- CMYK used if available
- File named clearly (event + date + size)
For more information: